Friday 26 December 2014

Week 03_ Progress

This week my job will be finish up the modelling of the Malay soldier character and testing for our newly installed renderer Vray. 

Continued from last week's progress on the shirt creation. I transpose the shirt sleeves into the character's arm position. Using Zbrush's build in retopology tool, I retopologised the shirt once again to avoid irregular topology. Next, I began to shape and sculpt the skirt to fit the soldier better and adding in rough details. 


I have tried to model the pockets and buttons using the usual sculpting methods, but that didn't work. So I try to model them in parts, by using the masking and extruding tool. In this manner , I would also have more control over the shape and details.


My approach to the shorts creation for the Malay soldier is similar to the shirt creation. First, I get a reference model and began the retopology process using Maya topology tool set.


After the tricky retopology process, I got a shorts base model with clean topology.


From the base model I have, I extrude the shorts leg to the respective length as shown in the references. Then, I add in some line detail while its easier to be done in Maya. Smoothed the model and export to Zbrush for further shaping.


Import the shorts model in Zbrush. 
The shorts is in place after positioning and shaping it to fit the Malay soldier model. 


There are other model element which are done by my teammates, such as helmet, belt and shoes. Those model part are also imported, positioned and shaped in place. Here is the look of the Malay regiment soldier at this stage, with most part of the uniform pieced together.


There are problem with shoe, where the model doesn't seems to be able to translate in Zbrush. The shoe model will stretch and distorted when I tries to move it. All this issue doesn't exist in Maya, need to check and deal with it next week.


This week the school have granted budget and purchased Vray to enhance our workflow, production quality and speed. With the new plugin, I have tested the shading and lighting using Vray, as well as its well known real-time (RT) rendering system. 


The real-time rendering works great, producing fast renders during working process and provides instance feedback on adjustments been made. However, thought some testing real-time rendering is not any faster, in fact slower in actual rendering of finals image sequence. For instance, it took 3 minutes per frame to render a sequence as shown below using real-time render; while Vray batch render only took lesser than a minute.


Monday 15 December 2014

Week 02_ Progress

The mainly focus for second week will be on having a general test lighting of scenes and cloth creation for soldier characters. 


With the rough assets of scene 01 prepared, I began my test lighting for the scene. Following the image references provide by the motion graphic students, I depicted a rough idea of the mood expected in the lighting. Overall color tone for lighting should be orange and red. However, I did add in a minute fill of blue tint in lighting. This is to fill the environment with slight variation to avoid a over reddish lighting.


 The idea was to have a strong key light to create the intense harsh directional light and shadow. This creates the rim light to bring out the tense and serious mood of the war time scenario. Although there are requirement on having a much more harsher and brighter key light, I still kept the lighting relatively dim to avoid overexpose renders. There will be more control in the compositing process, changes in ideas could easily be adapted.


Here are some test compositing done by me. Lighting and colors could be enhanced dramatically. 


Playing around with various color channels to create the moody feel. The slight bluish tone came in handy, making use of color channels; the blue tone not only break the intense redness, it also increase the depth in the render. However, this is not the final lighting or look for the scene. I have pass these test renders to the motion graphic students. They will then feedback to us about the art directions and further changes in lighting.


As mentioned in previous discussion sessions, the ocean in the 2D map could be moving. Hence, I came about to create the ocean surface first.


The ocean simulation was done using Maya fluids and its ocean shader. The look of the water surface was approved at this stage, and further adjustment might occur.


I have try many approaches on the cloth creation before I found the right method for me. At first, I tried to do it all in Zbrush, by extrude and extract the surfaces from the soldier mesh, and edit the from there. This might work to a curtain extend, but due to lacking of Zbrush skills I failed to sculpt the shirt collar. 


So I have looked for other alternative methods. Some did not work well also. I did attempted to model the shirt from scratch in Maya. That didn't work as expected, as I did not acquire enough knowledge in human anatomy and topology modelling skills to do so.   

Finally, I have discover the best way for me to model a shirt with proper topology. That is through downloading a existing shirt model, and make use of Maya latest retopology tool set to retopologise it. Reason behind it is because the downloaded model is a unusable broken mesh with messy triangulate topology. Importing that in Zbrush will result to a unworkable mess. 


The retopologising process in Maya wasn't as easy as I previously thought. After several fail attempts, I have learn to plan my topology accordingly to the mesh to avoid mistakes such as symmetry of lines. 


 I proceed to model the shirt collar right after. With a proper topologised shirt creating the collar is a lot easier. Having all the basic shape of the shirt completed, I use nCloth dynamic simulation to fit the shirt on the character, this will also create the natural general folds on cloths.  


 Next step is to import the planar shirt mesh into Zbrush. After extracting the thick in the shirt, its ready for adding other detail parts.


It's quite tricky to bring and merge to files in Zbrush, took me some time to figure that out. As I'm still really new to the software Zbrush, I have learned a lot of new tools and technics during the working process. The next step will be sculpting details such as line details, buttons and pockets.


Having the character with separated parts, I have also figure out the way to create a clean UV easily.


Sunday 7 December 2014

Week 01_ Progress

I was been briefed on the tasked client project on the first day of FYP. Understanding, I will be working on a World War II(WW2) theme project given by the national heritage board (NHB). 

The next day my lecturer held a small meet up session discussing on more details of the project . This will be a collaborative project between the students from motion graphic course and us, visual effect students. Our main task is to create a full CG opening and closing sequence, transiting in and out of a 2D animation short, Battle of Bukit Chandu. Here is the map where it took place.


The motion graphic students have plan and drew storyboards on the sequences we are required to do. Much of the camera angles and movements aren't confirmed yet. They did have some animatics done for preview, but still it isn't clear enough. However, after further discussions, we did have a better idea of what we are trying to achieve. 


Now that I know that we have to create a full CG war scene from scratch. This means lots of asset needs to be prepared. The good news is that all objects and soldier characters will be stationary, hence no animation is needed. 

Planning begins right away. 
1. Analyzing various scenes.
2. Listing down a general category of assets needs to be prepared.
3. Standardize a naming convention for both asset and scene files to reduce or avoid confusion.
4. Assigning everyone individual tasks on asset preparation.


Jovial - assigned on rifle asset creation
Jing Yi - bullet and bomb asset
Jesmine - badge asset
Zuridi - sand bag asset and blood simulation
Jikian - rifle knife and procedural barbed wire asset, helping on L-system tree creation
Jeremiah - in charged on most terrain creation


I personally undertakes the water, smoke, leaves simulation and in-charged on lighting as well as the soldier characters asset design and creation. After analyzing the storyboard, there are minimum 3 type of soldiers we have to create. Then duplicate them, posting and positioning in various location.

1. Malay regiment soldier
2. Japanese soldier
3. Punjabi Japanese soldier

All of them will have different looks and uniforms. Researching for various reference on each of the soldier types. Having a idea on which part of the military uniform design or accessories is really necessary and what could be omitted. Even after some simplification on designs, there are still high amount on details needed to be modelled out.


The largest challenge on creating those soldier asset is the modelling process. Sculpting is essential to create the human soldiers. However, none of our FYP team members have any experience with software such as Zbrush. Hence, I have to pick up and learn Zbrush from the beginning. With little knowledge just learned from tutorials I have to create human figure right away. 

I decide to begin with the Japanese soldier. Helping me to get started on the soldier asset creation, I begin sculpting in Zbrush based on a default human shape model build in the software. From there I slowly sculpt and deform the default human to make it looked like a Japanese. This is the first time I am trying to sculpt any human, I did my best on using the tools I have just learned in Zbrush.


Next, the Malay regiment soldiers. The iconic soldier of the Malay regiment was Adnan Bin Saidi. That's why I decided to model the Malay soldier according to his facial features.


Considering the Malay regiment are much more skinny I have sculpted the body in that manner. Due to the skinny factor, I have to use the transpose tool in Zbrush to re-position the arms and legs to sculpt the area of underarm and between legs.


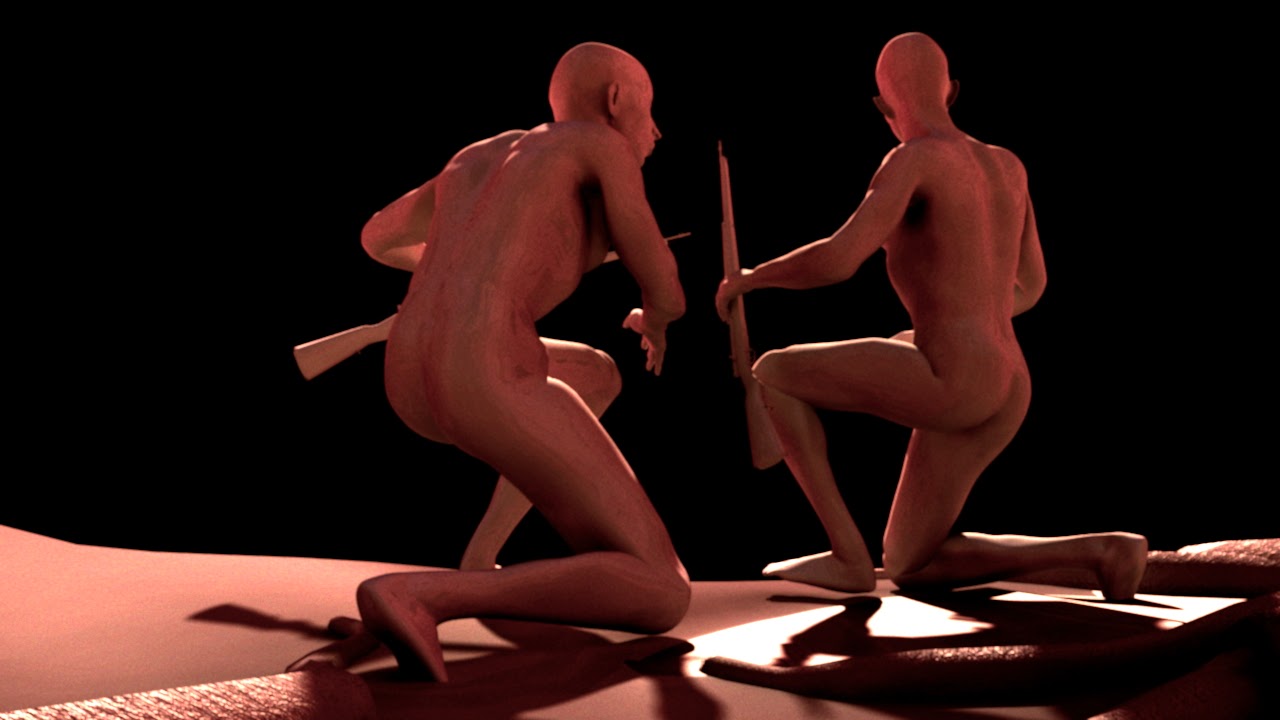
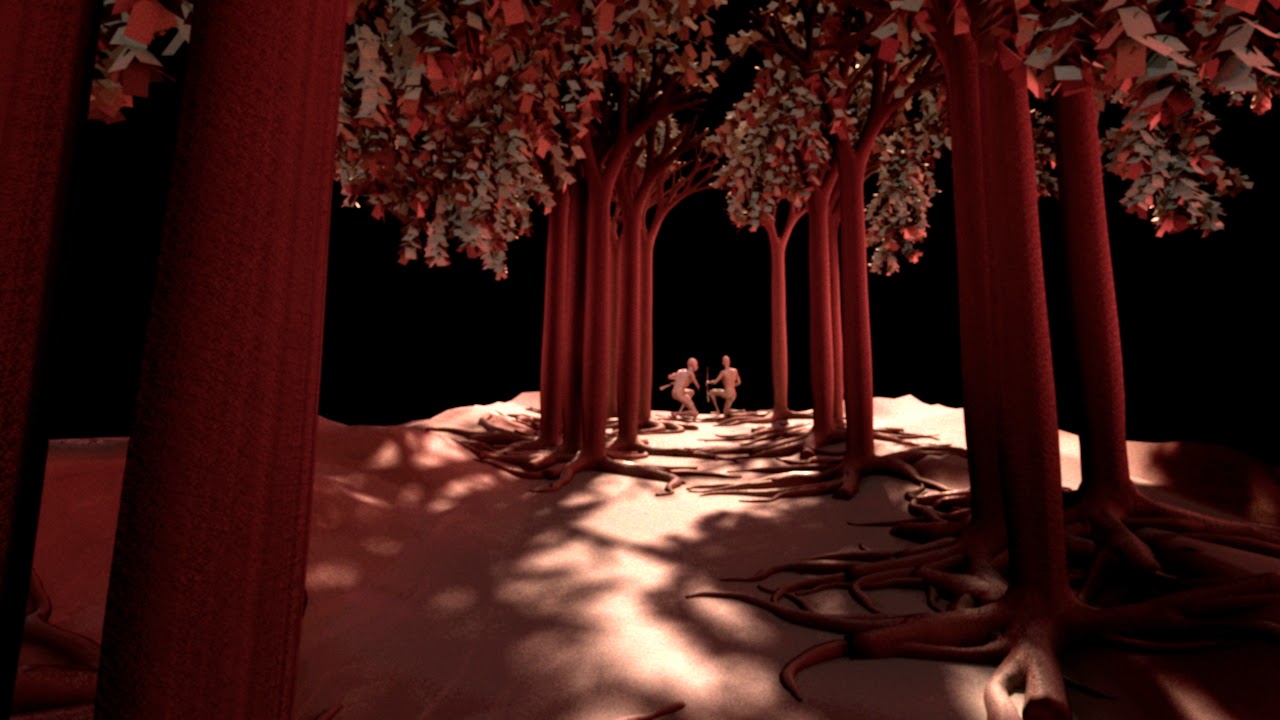
I was told by my lecturer to begin posing the character at this stage. This is to create a animatic previs for a better visualization of the camera movement. At first, I try posing in Zbrush using the transpose tool. Minor posing movement works fine using this method. However, drastic posing of character will not work very well, as without proper weightpainting, severe stretching of polygons will happen. Fixing those polygonal scratching to will be very hard and time consuming, or basically means to rescrulpt from scratch. This will be extremely ineffective as we have dozens of soldier characters require to be posed in position.


The Zsphere technic is to create a series of linked weighting points that act like skeleton, enable us to pose the character. Same as the transpose technic, it has its own limitation in posing characters. Drastic posing will not work as severe weird distortion will occur with larger limp movement. Eventually, I have to give up posing in Zbrush.


Where the alternative is to create a rig for every soldier character. This would be more technically challenging and tedious at the same time due to the weight painting process. I have used Mixamo autorig to help create a basic human rig to get started. While the model isn't rig and weight painted perfectly, but I would just use this for the previs posing purpose.


I have done some adjustment with the rifle asset modeled by my team members. With these elements, I could start test posing in the actual scene.


A rough terrain have been done by Jeremiah with the help of Jikian. I basically take over the scene file and start posing and position the Malay regiment soldiers. With some discussion and tweaking of camera movements, we then playblast the previs to show to our lecturer.


Next week, I will began the clothes creation as well as the test lighting for the scene.